So, I had tried to water marble before, but it never worked our right, I just got annoyed and gave up. I have a few days off from work this week and figured that I have a lot more spare time on my hands, so I wanted to give water marbling another chance. This effort is by no means perfect, but this is the first manicure I have done where I am pleased with the results.

This is what I did: first I painted all my nails with a base colour, Models Own Beth's Blue, I applied one coat.

For my marbling colours I used Models Own in Blue Lagoon and Lemon Meringue and Barry M in Spring Green.

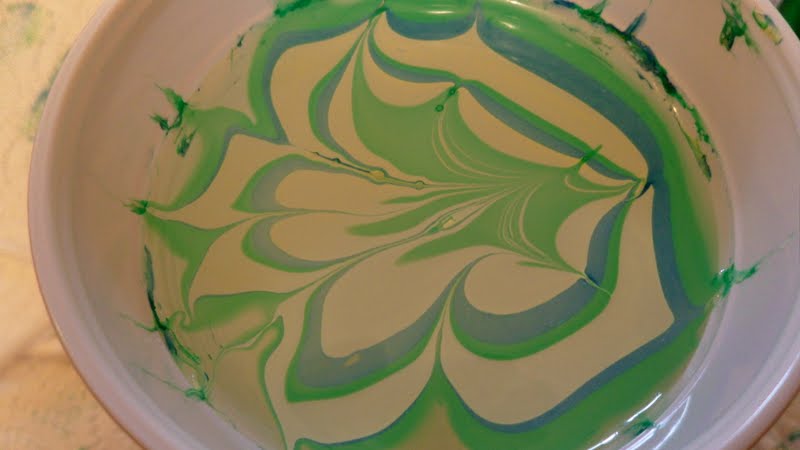
Using a plastic cup filled with water (much easier than using a china bowl, because you can just throw the cup away after) I dropped a dot of each polish in the centre and watched it spread. I did this a few times with each colour.

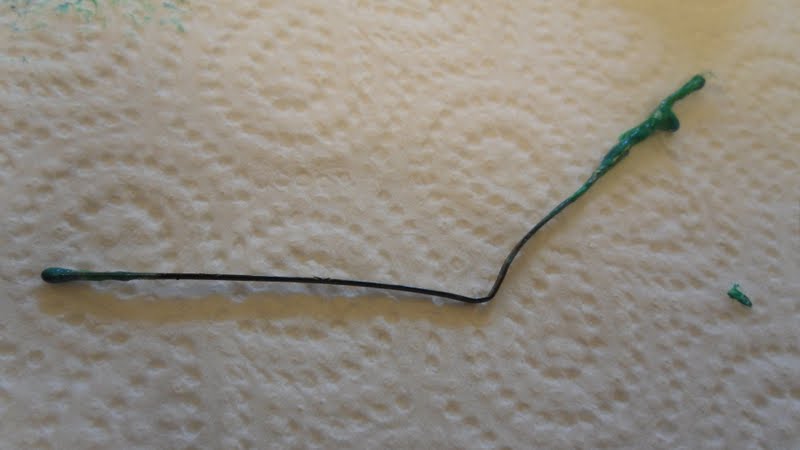
Then using a bent out kirby grip I created patterns along the polish, work quickly because as I discovered if you work slowly the polish can dry out on the surface of the water and it makes it much harder to manipulate.
When I was happy with the pattern created I dunked my finger in the water a pulled it out slowly.....

Now, next time I do this I will put sticky tape round my fingers as this does make a lot of mess, but nothing a cotton wool pub can't fix.

I do like that each time I did this I could create different patterns, so each finger is different.


I then used China Glaze fast forward top coat to smooth everything out, I did get a few air bubbles from my marbling, hopefully with more practice I will figure out how to avoid these. Like I said, this is by no means perfect and compared to other people's efforts perhaps quite poor but I like it! For me this have given me a little more confidence to try this technique again.
I think it looks fabulous! I haven't tried this method yet, but I want to!
ReplyDeletethey're great :D
ReplyDeleteAw thankyou girls x
ReplyDeleteThis is sooo COOL!!!! WOW Thanks for explaining how to do it step by step! I keep seeing on all these blogs the cool results but no step by steps. I won't have to be jealous of other people now, thanks!!
ReplyDeleteNice marbling! It's a shame you can't see the Beth's Blue underneath but the colours are very pretty =) x
ReplyDeleteNo problem Beauty on a college budget :-) I found it helpful on other's blogs to see step by step pics so thought I would share the helpfulness hopefully! Leishasaurus - thanks, yes I know how you mean, Beth's blue is one of my fav new colours now!
ReplyDeleteThis is awesome!! It looks so fun to try and turned out great!
ReplyDelete♥ Shia
i love color combo, this really look nice :-D
ReplyDeleteI love the colors you chose. Marbled like that, they remind me of Van Gogh's Starry Starry Night.
ReplyDeleteWOW!! LOVE this xxx
ReplyDeleteAw, thankyou everyone, x
ReplyDeleteThey look lovely :) my first marble effect nails didn't turn out as good as I expected either, but my second attempt wasn't too bad! I get a lot of ideas for nail art etc from youtube and lots of those give you step by step instructions (just in case you fancy trying anything else and haven't already looked there). Lovely colour choice, think I may do another marble one next :) x
ReplyDelete